JoyLo
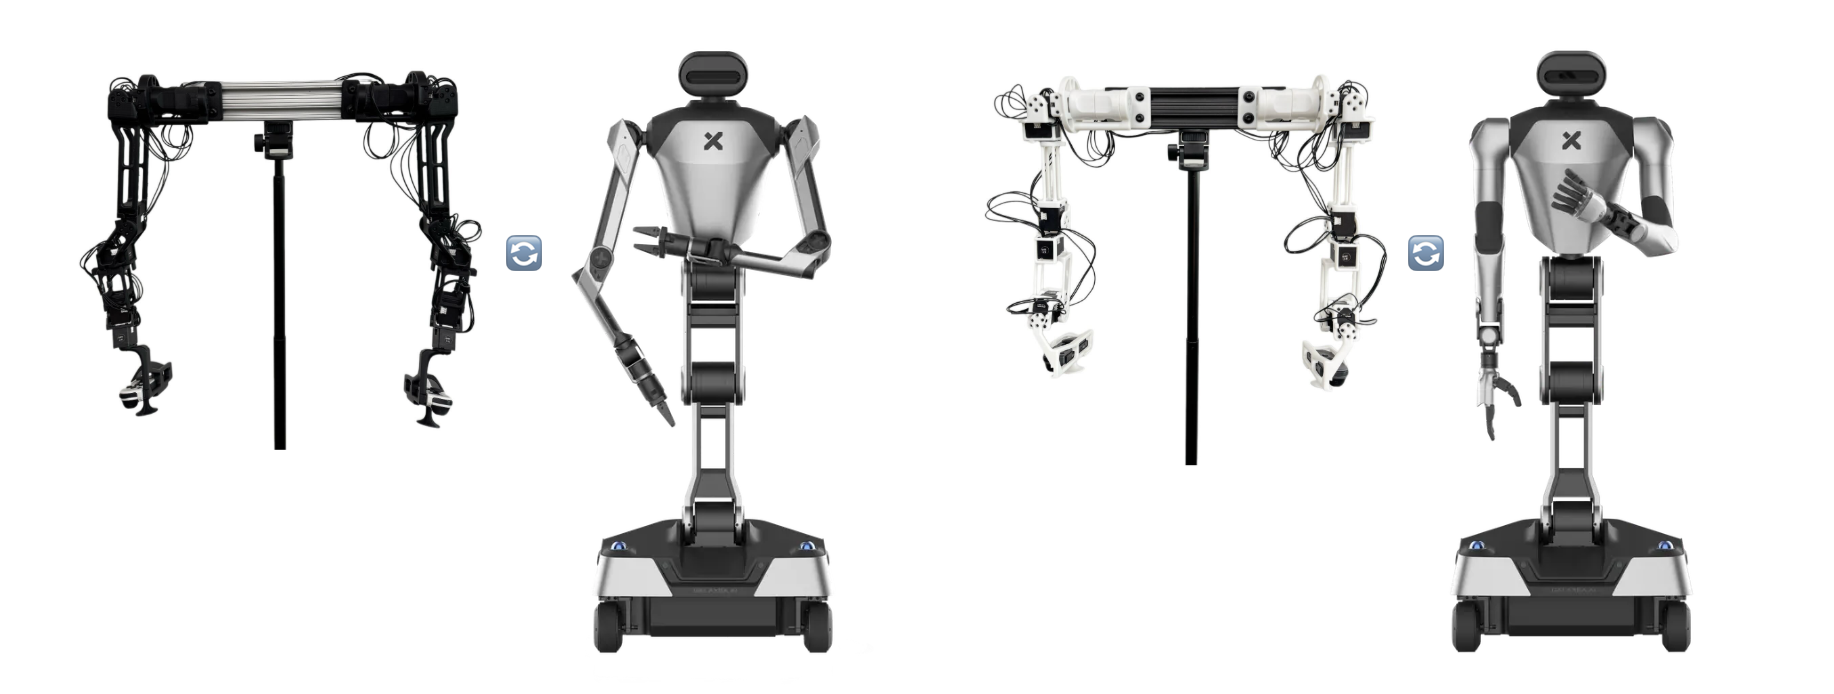
JoyLo teleoperation system is first introduced in BEHAVIOR Robot Suite as an effective teleop device for R1 robot, providing a cost-effective whole-body teleoperation interface that enables seamless control of mobile manipulators with high degrees of freedom. Originally designed for real-world robots, JoyLo has been extended to support simulation environments and is now fully compatible with OmniGibson.

Additionally, in OmniGibson, we support more robots beyond the original R1, including mobile manipulators R1 (6dof arm) and R1-pro (7dof arm), as well as single arm robots like A1 (6dof) and Franka (7dof).
Hardware Setup
Detailed hardware setup guides are available in the BEHAVIOR Robot Suite documentation for both robot variants:
6 DoF R1
For the 6 DoF version, refer to the R1 setup guide.
7 DoF R1-Pro
For the 7 DoF version, refer to the R1-Pro setup guide.
Software Setup
Prerequisites
- Linux operating system
- NVIDIA RTX-enabled GPU
- External Bluetooth dongle (recommended: [link])
Step 1: BEHAVIOR Environment Setup
Refer to the installation guide and setup the BEHAVIOR environment with the --joylo flag.
Step 2: Nintendo JoyCon Configuration
-
Configure udev rules:
-
Add the following content to the file:
# Switch Joy-con (L) (Bluetooth only) KERNEL=="hidraw*", SUBSYSTEM=="hidraw", KERNELS=="0005:057E:2006.*", MODE="0666" # Switch Joy-con (R) (Bluetooth only) KERNEL=="hidraw*", SUBSYSTEM=="hidraw", KERNELS=="0005:057E:2007.*", MODE="0666" # Switch Pro controller (USB and Bluetooth) KERNEL=="hidraw*", SUBSYSTEM=="hidraw", ATTRS{idVendor}=="057e", ATTRS{idProduct}=="2009", MODE="0666" KERNEL=="hidraw*", SUBSYSTEM=="hidraw", KERNELS=="0005:057E:2009.*", MODE="0666" # Switch Joy-con charging grip (USB only) KERNEL=="hidraw*", SUBSYSTEM=="hidraw", ATTRS{idVendor}=="057e", ATTRS{idProduct}=="200e", MODE="0666" KERNEL=="js0", SUBSYSTEM=="input", MODE="0666" -
Refresh udev rules:
-
Install Bluetooth manager:
Step 3: Connect JoyCons
Method 1: Using Bluetooth Manager (Recommended)
- Ensure your external Bluetooth dongle is connected
- Open Bluetooth Manager
- Search for JoyCon devices and connect when they appear
Method 2: Using Command Line (If Method 1 fails)
- Run the following commands:
- Verify connection: JoyCon lights should be static (not flashing)
Step 4: Running the System
- Ensure JoyLo is powered on (with motors NOT connected to Dynamixel software)
-
Ensure JoyCons are connected
-
In one terminal, start the recording environment with a specified task:
-
In another terminal, run the JoyLo node:
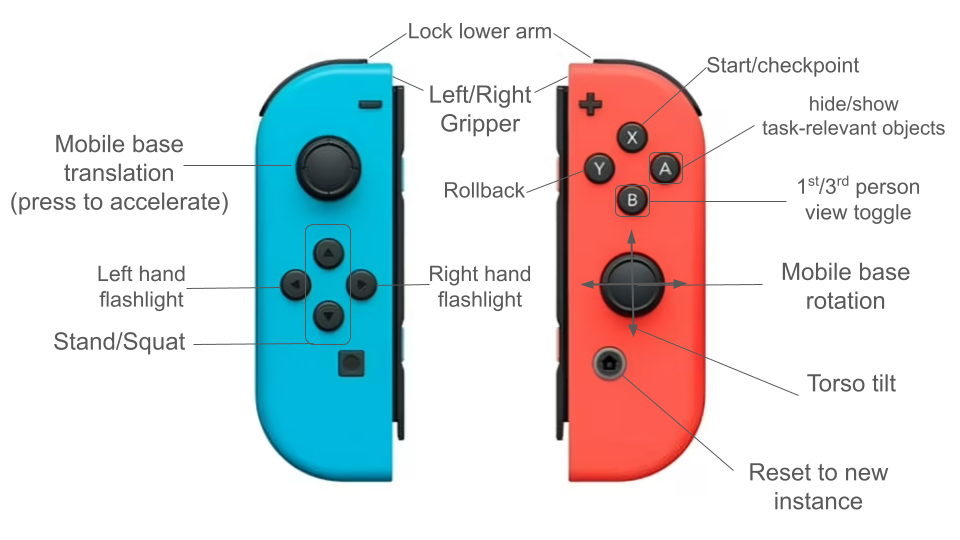
Joycon Button Mapping
Usage Notes
- Press the home button on the right JoyCon to save an episode and reset the scene
- To save all episodes and exit, focus your mouse on the OmniGibson window and press Escape
- Recording file will be saved to the path specified in the launch_nodes.py command
- Fast base motion mode: Activate by pressing down on the left joystick while moving it
- Object visibility toggle: Press A button on the right JoyCon to toggle between hiding non-relevant objects and showing all objects
- JoyCon connection stability: We have noticed that sometimes the JoyCon could disconnect randomly during data collection. A team member has reported that putting the Bluetooth dongle onto USB 2.0 is more stable than USB 3.0. We will look further into this issue.
Task Information
- To learn more about available tasks, refer to the BEHAVIOR tasks page
- For task definitions and expected goal conditions, check the corresponding
problem0.bddlfile in the BDDL repository for the task name. This file contains information about relevant objects, initial conditions, and goal conditions.
Troubleshooting
JoyCon connection issues
- If JoyCons won't connect, try the command line method (Method 2 above)
- Ensure you're using an external Bluetooth dongle, as built-in Bluetooth may not be compatible
- Verify that udev rules are properly configured if devices aren't recognized
- If JoyCons disconnect randomly during data collection, try connecting the Bluetooth dongle to a USB 2.0 port instead of USB 3.0
- If the JoyCon is being used as a mouse, double check this setting (or alternatively remove
50-joystick.confdirectly) - If the JoyCons are connected to Ubuntu in bluetooth but are still unable to be detected from Python, try
pip uninstall hidapi, and thenpip install hid pyglm, and then try again
HID issues
- If you see something like
ImportError: Unable to load any of the following libraries:libhidapi-hidraw.so libhidapi-hidraw.so.0 libhidapi-libusb.so libhidapi-libusb.so.0 libhidapi-iohidmanager.so libhidapi-iohidmanager.so.0 libhidapi.dylib hidapi.dll libhidapi-0.dll, trysudo apt install libhidapi-hidraw0.
Joycon Calibration
Connect joycons and run:
JoyLo Joint Calibration
- JoyLo sets can be assembled in slightly different ways, resulting in different orientations of the motors and offsets between the physical motor positions and the joint positions in simulation.
- A script for automatically determining these joint signs and offsets is available in
scripts/calibrate_joints.py
Example Usage
(Make sure to specify the samegello_name argument when using your set to run the simulation).
Reference Positions
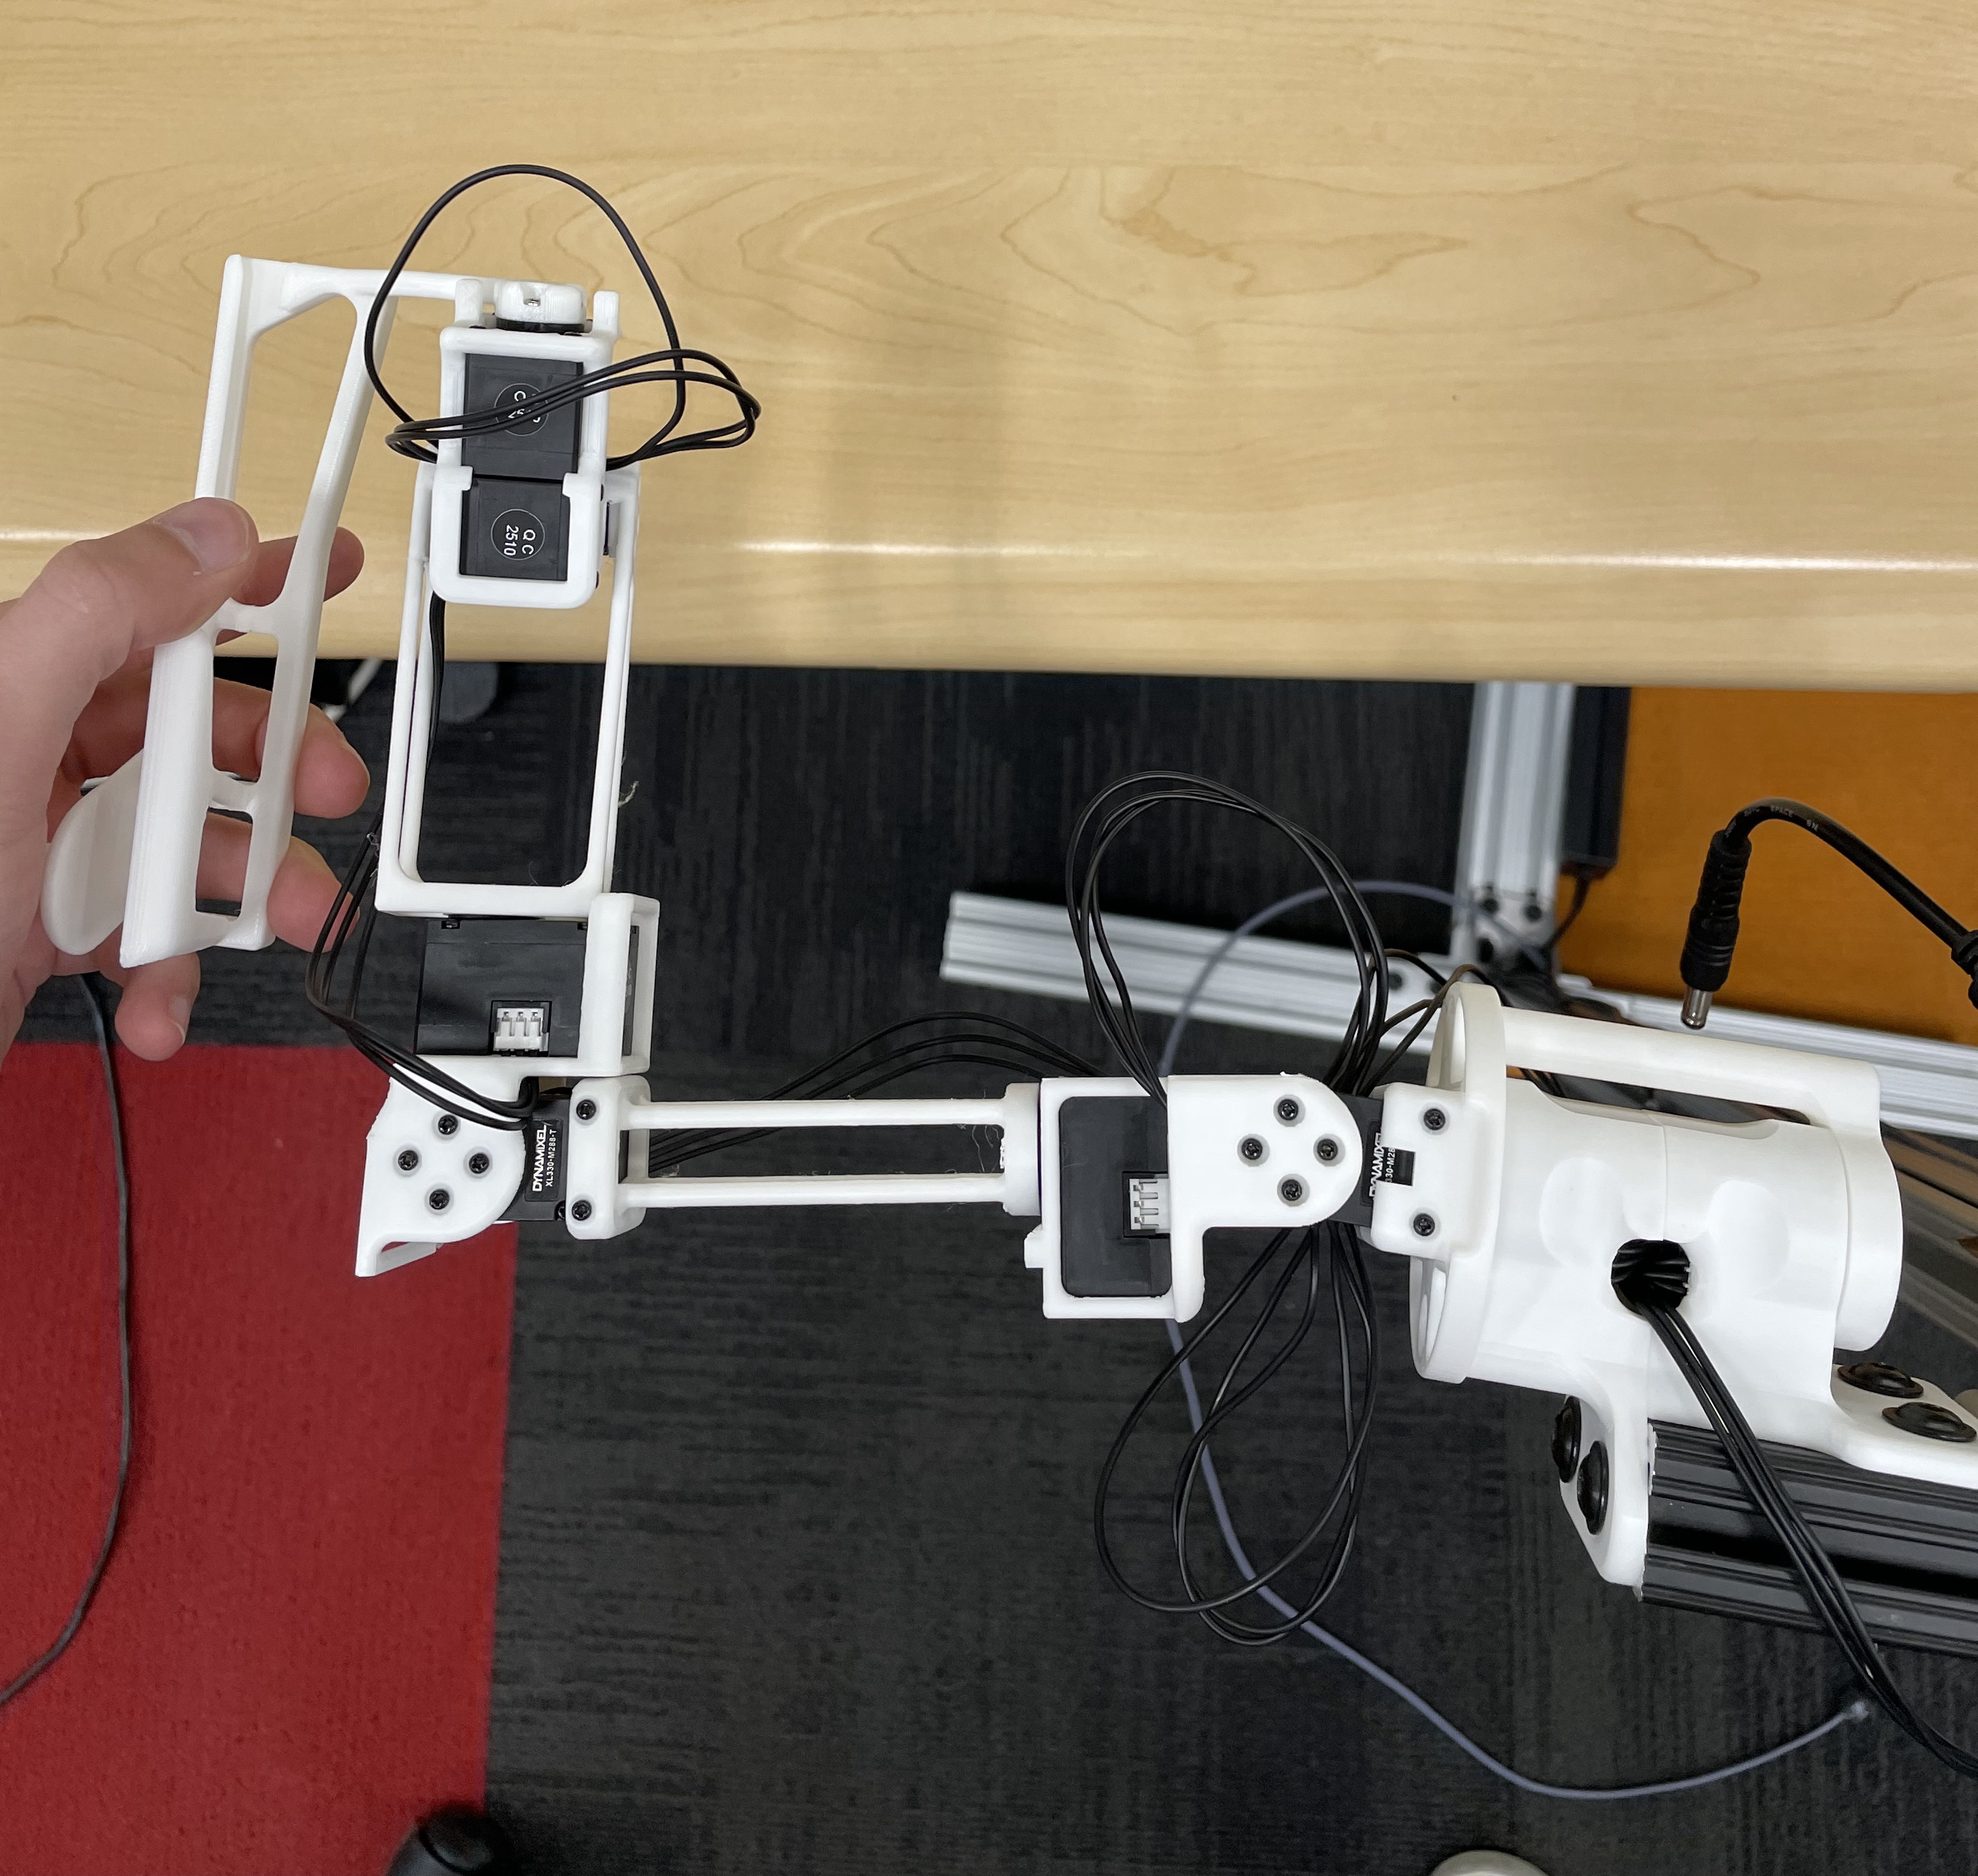
The calibration script requires each arm to be placed in two fixed reference positions, called the "zero" and "calibration" positions. These are provided below for both the R1 (6-DOF) and R1-Pro (7-DOF) JoyLo variants.
| R1 (6-DOF) | R1-Pro (7-DOF) | |
|---|---|---|
| Zero Position | 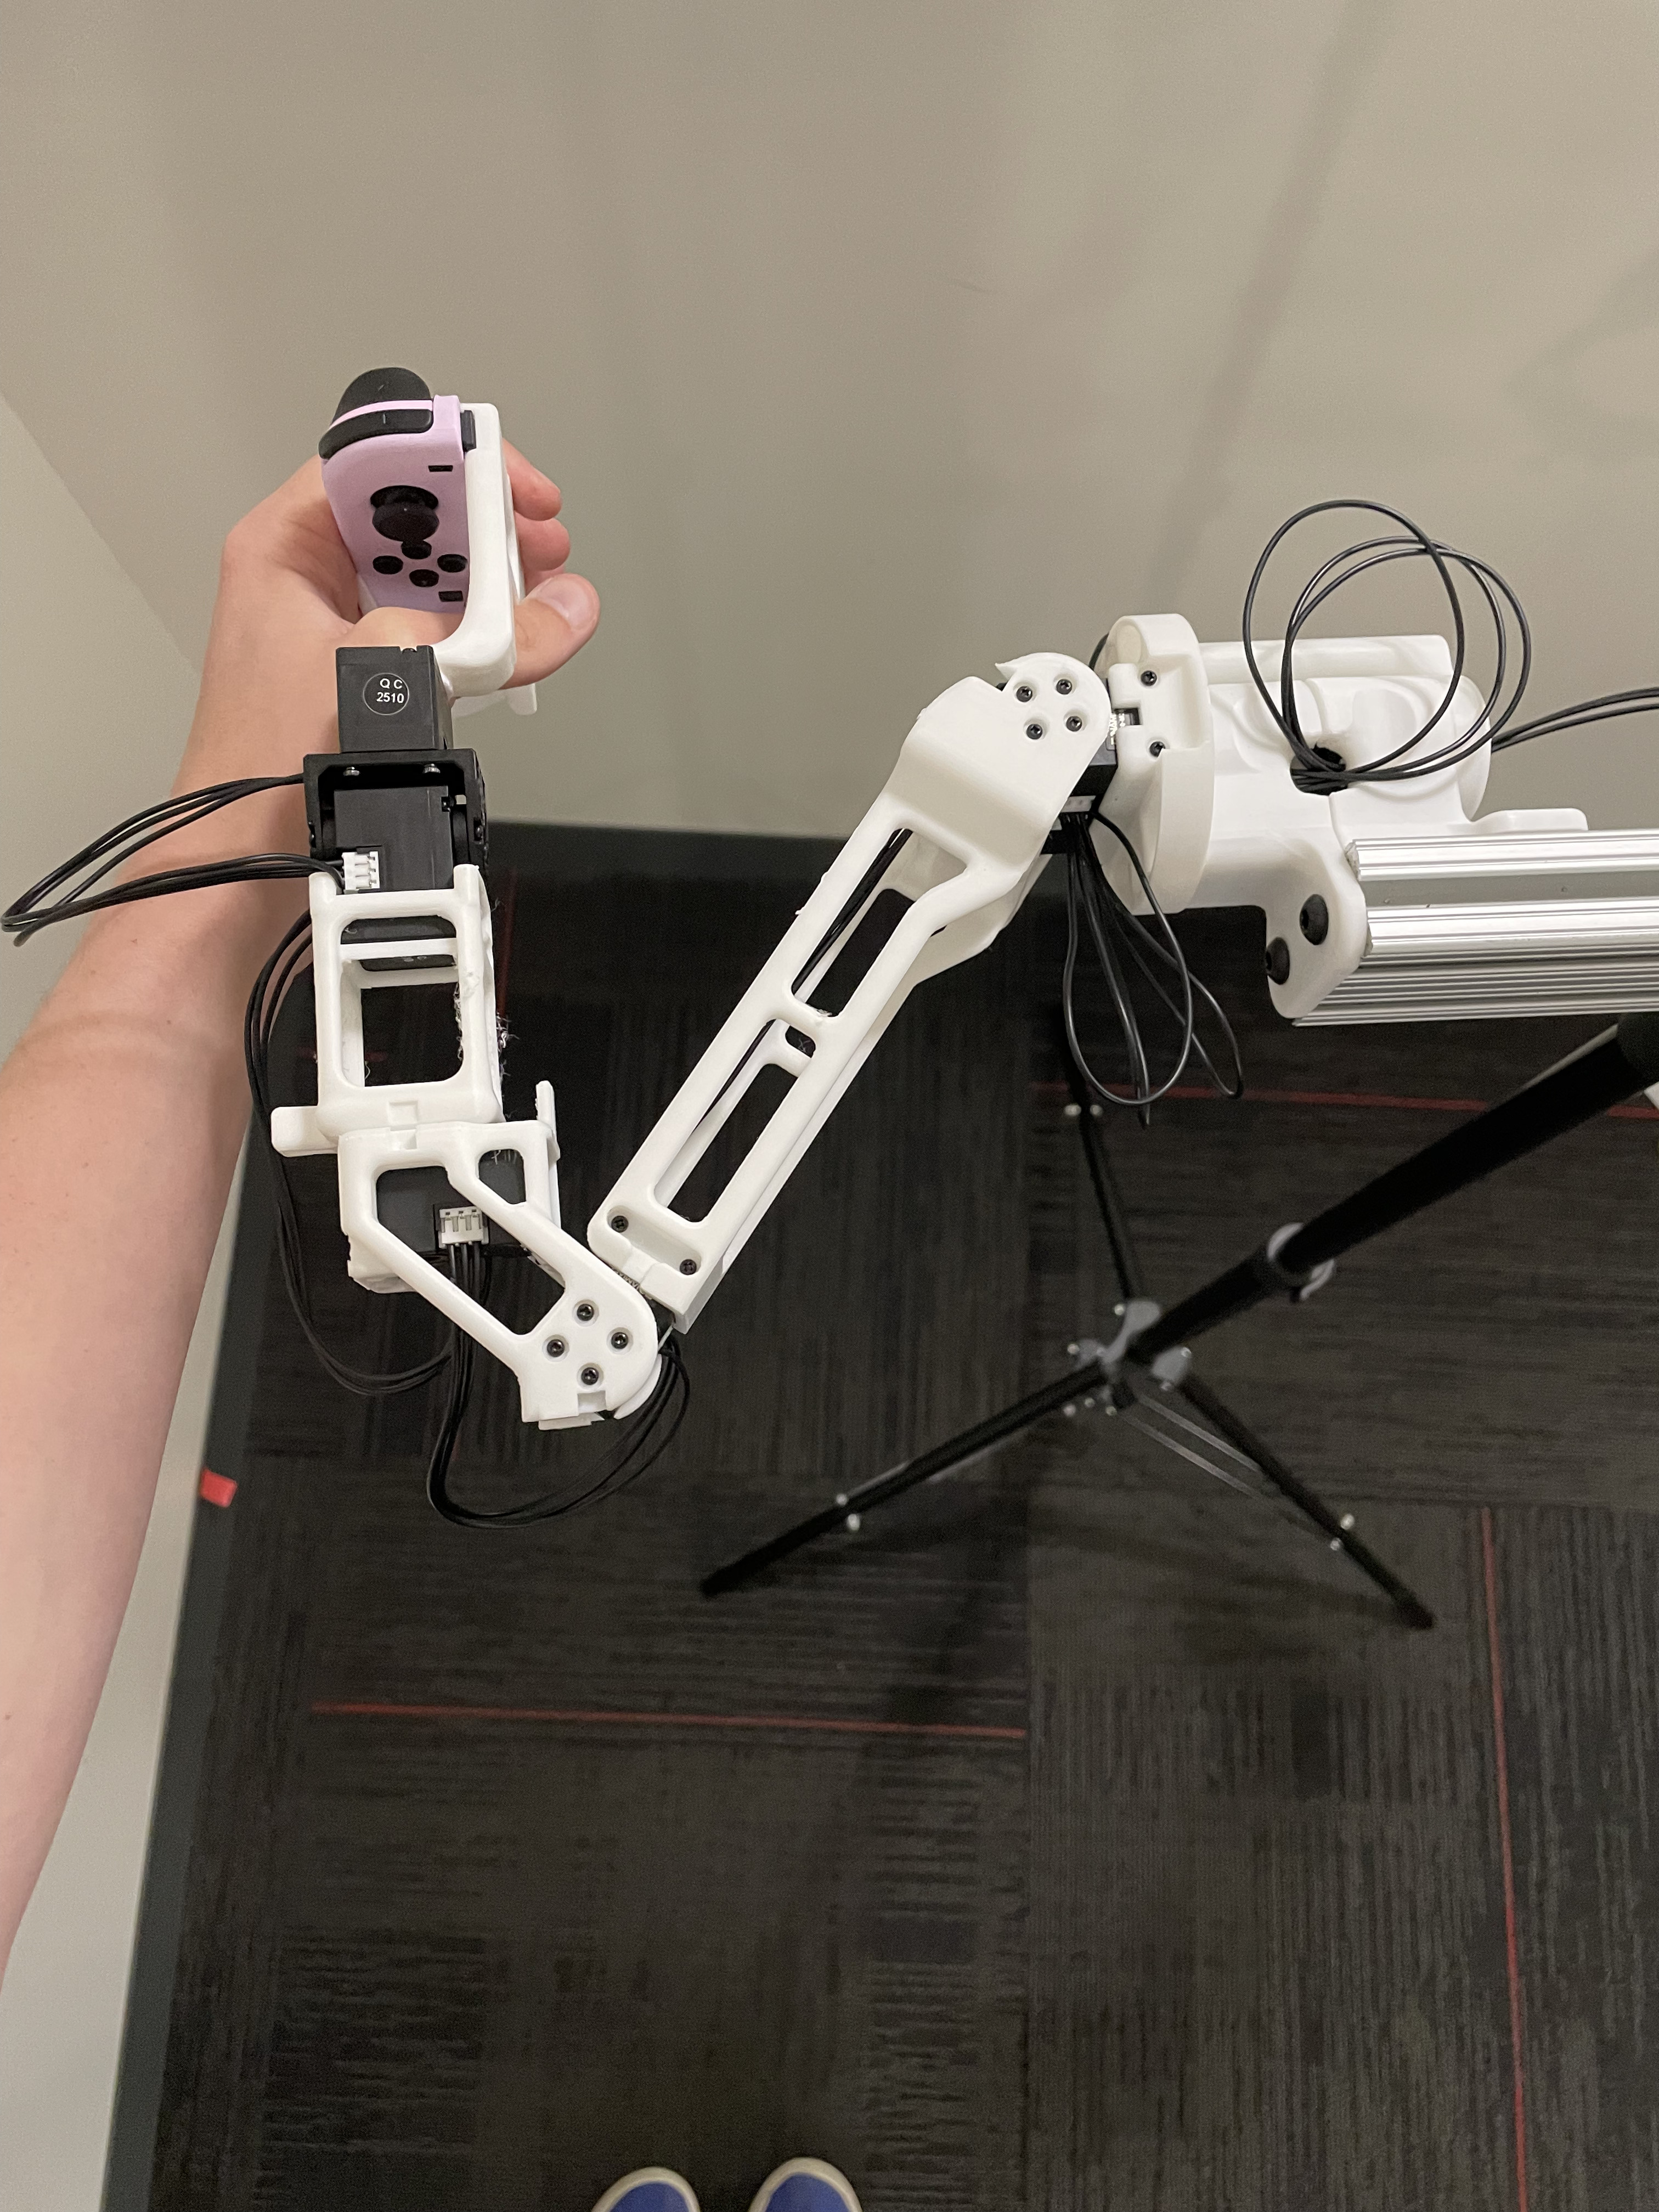 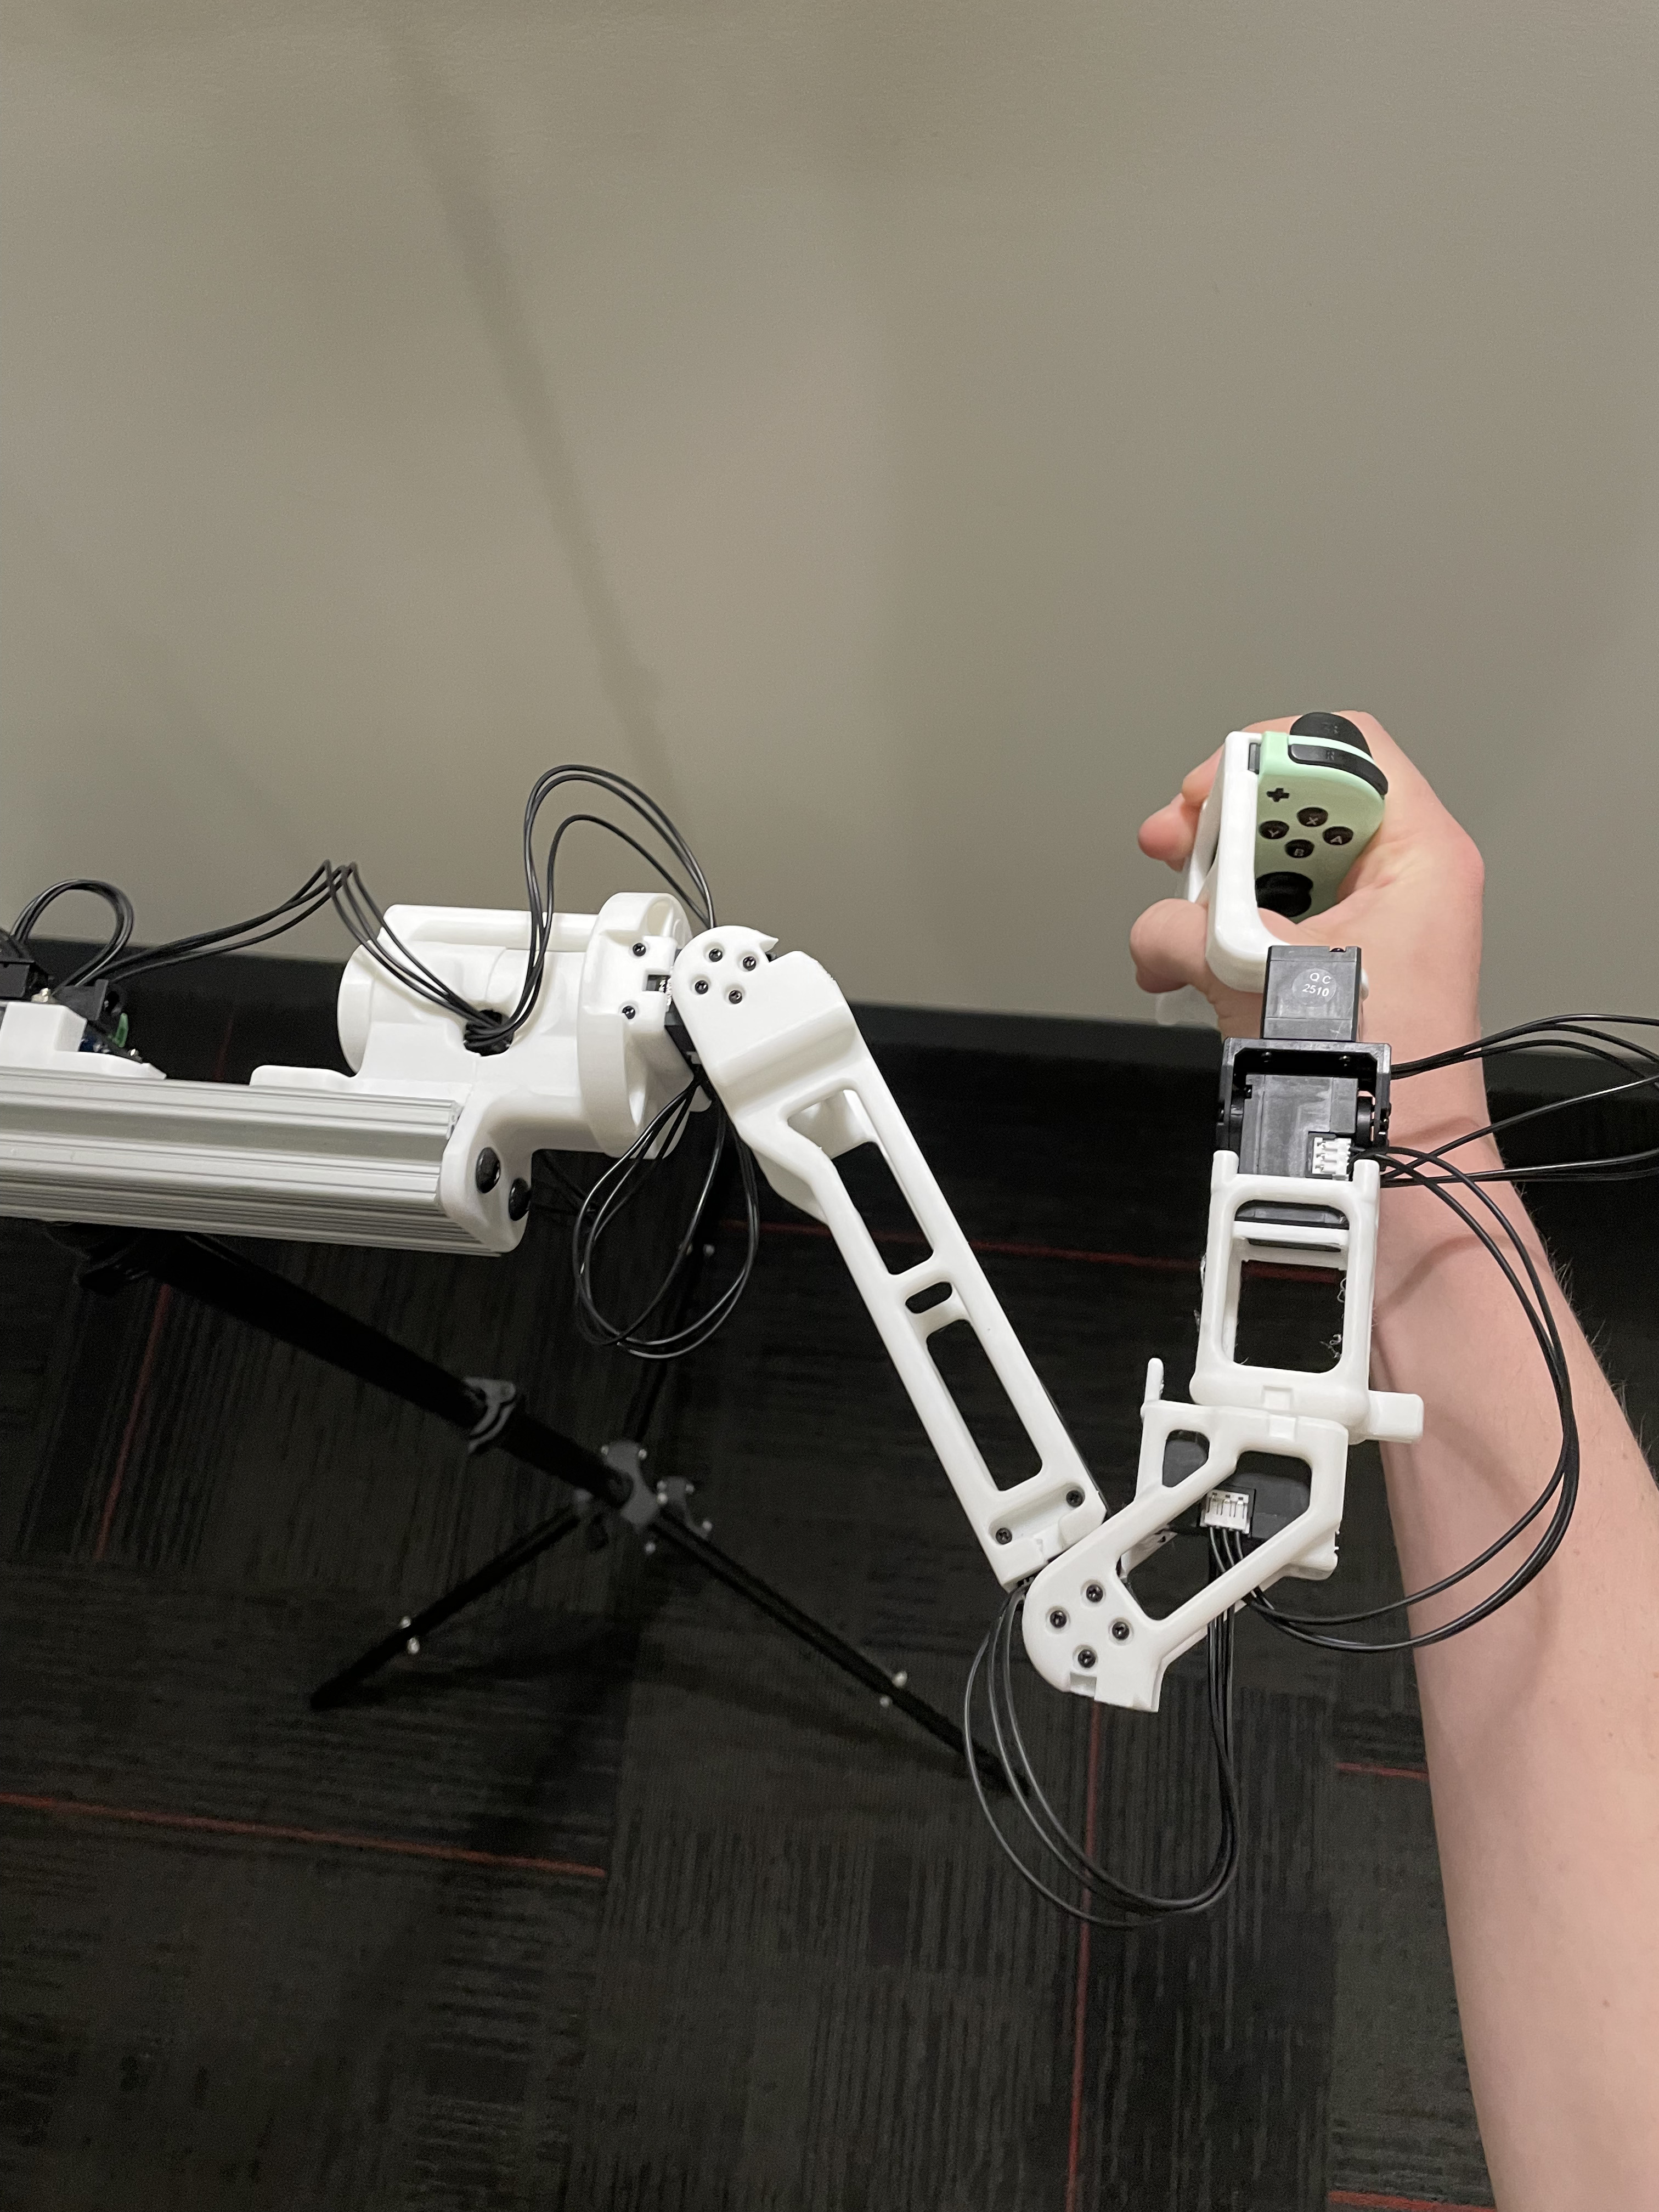 |
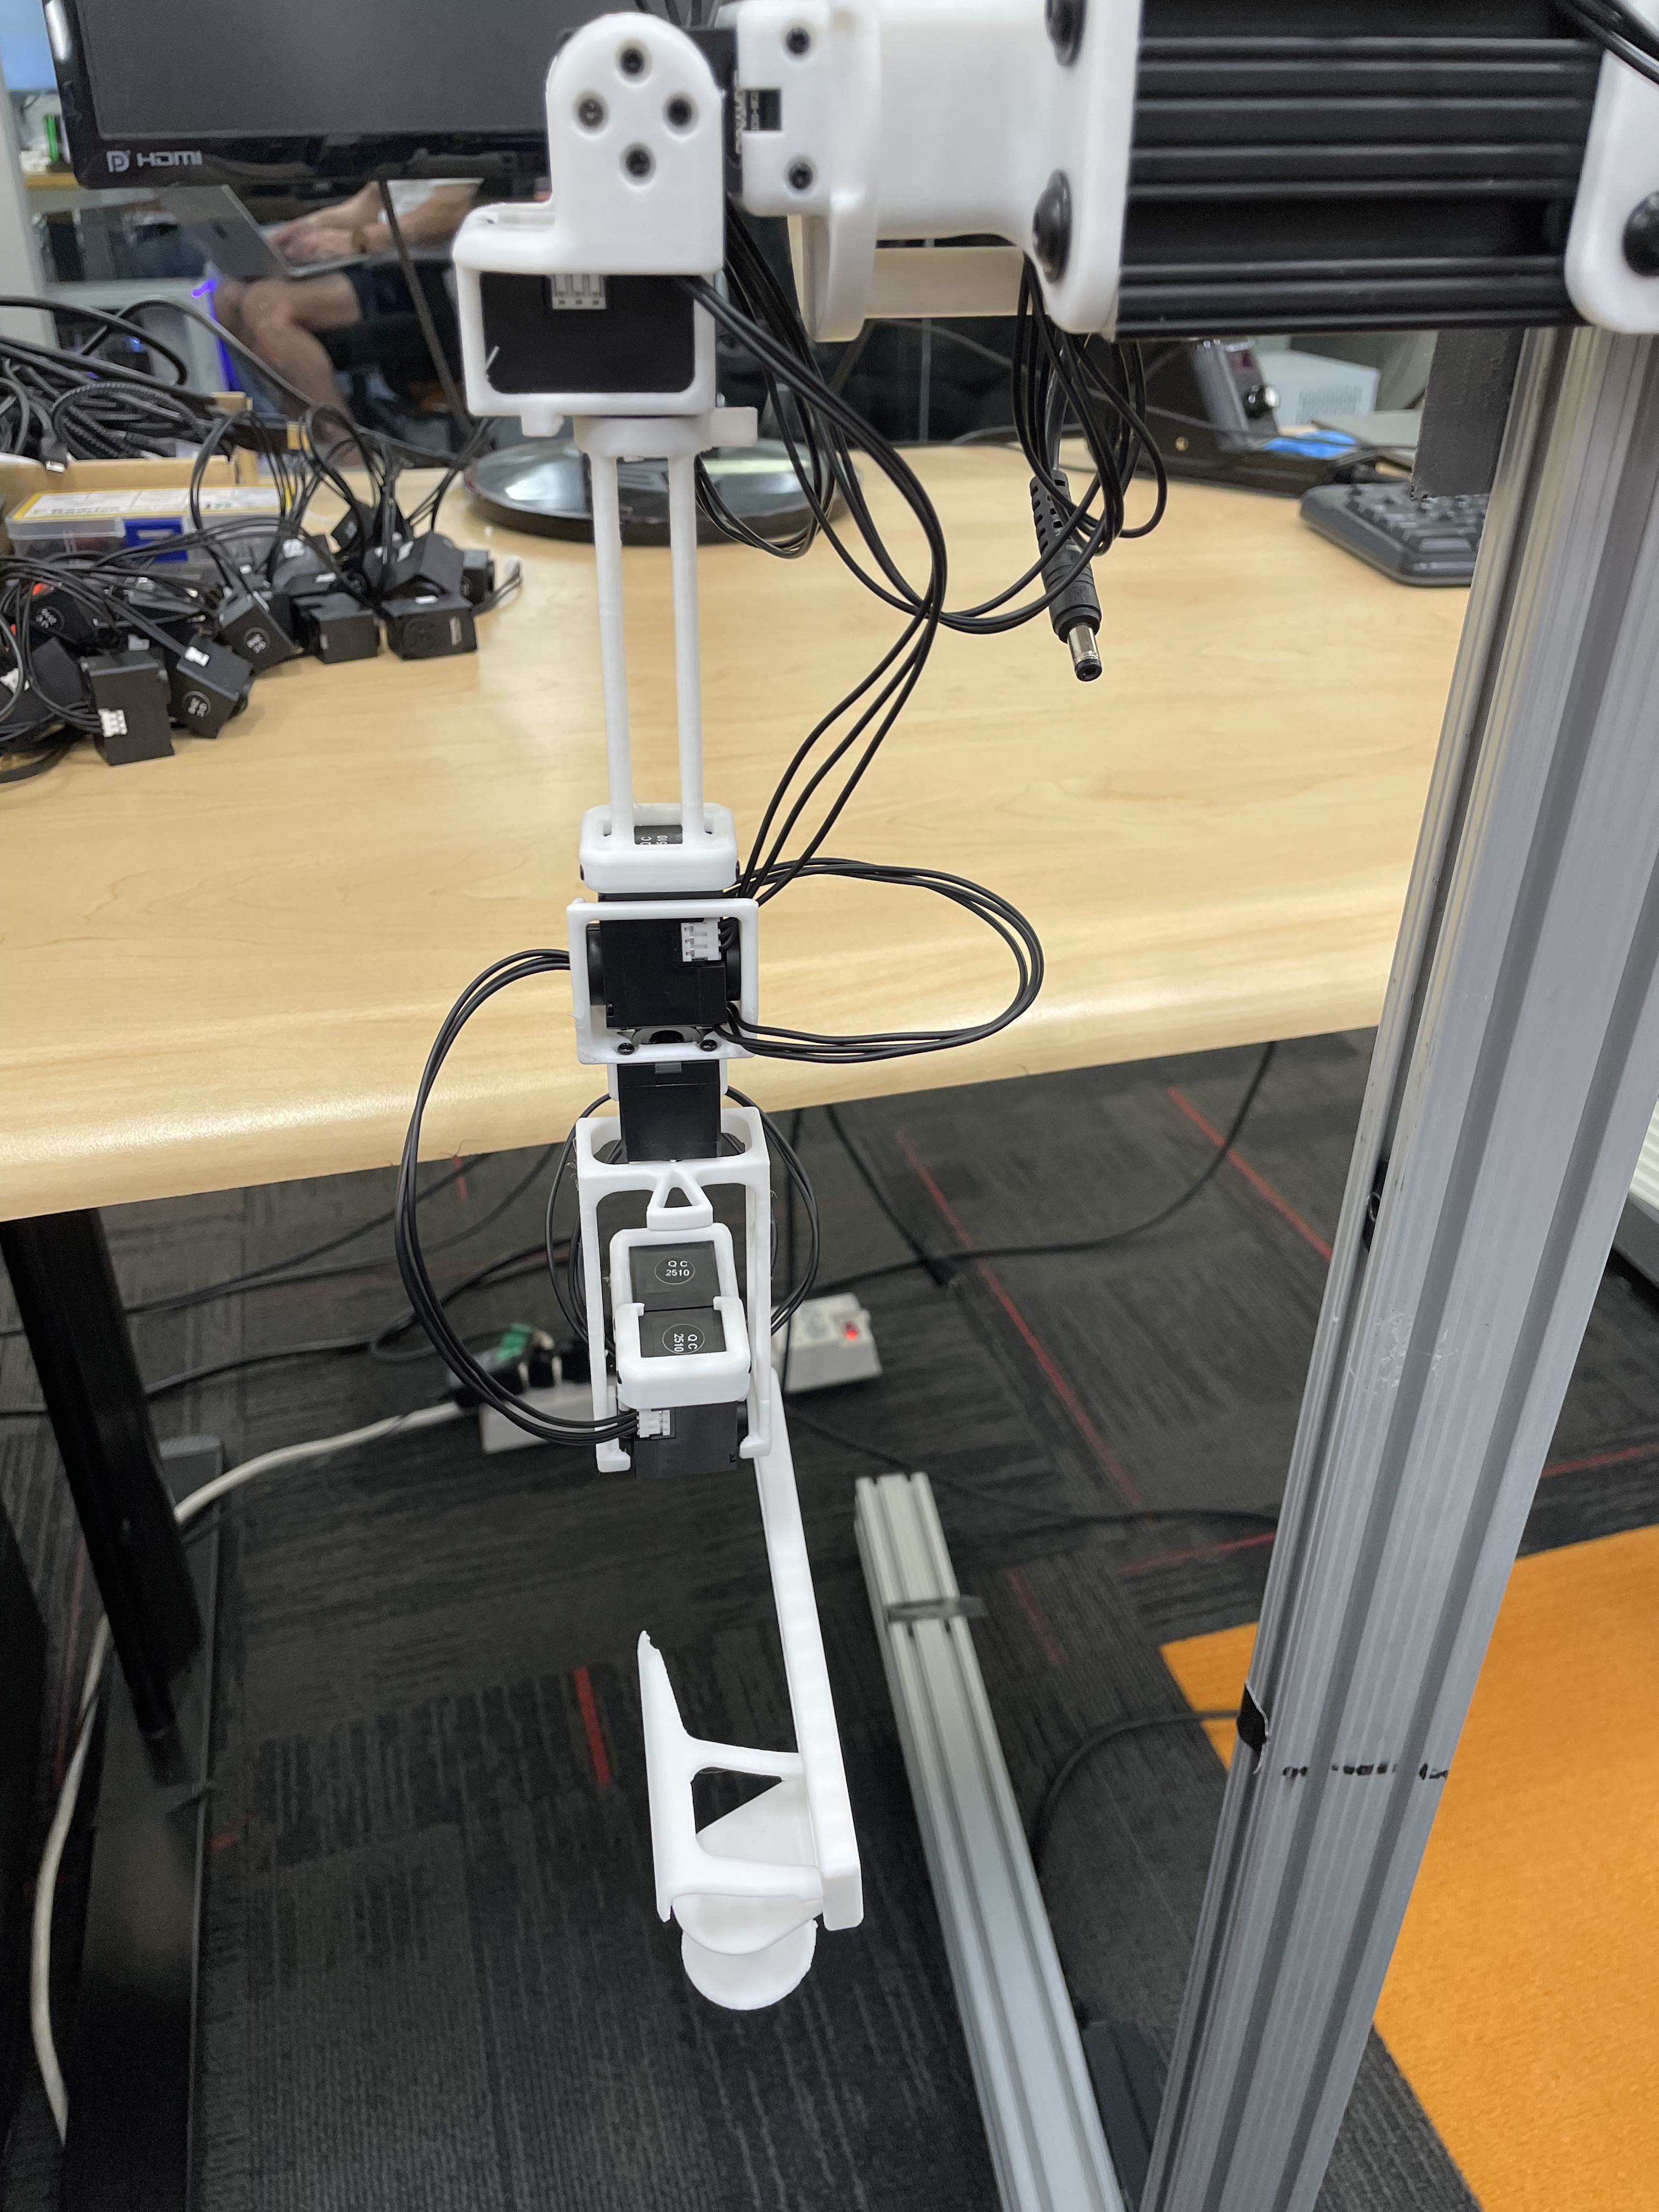 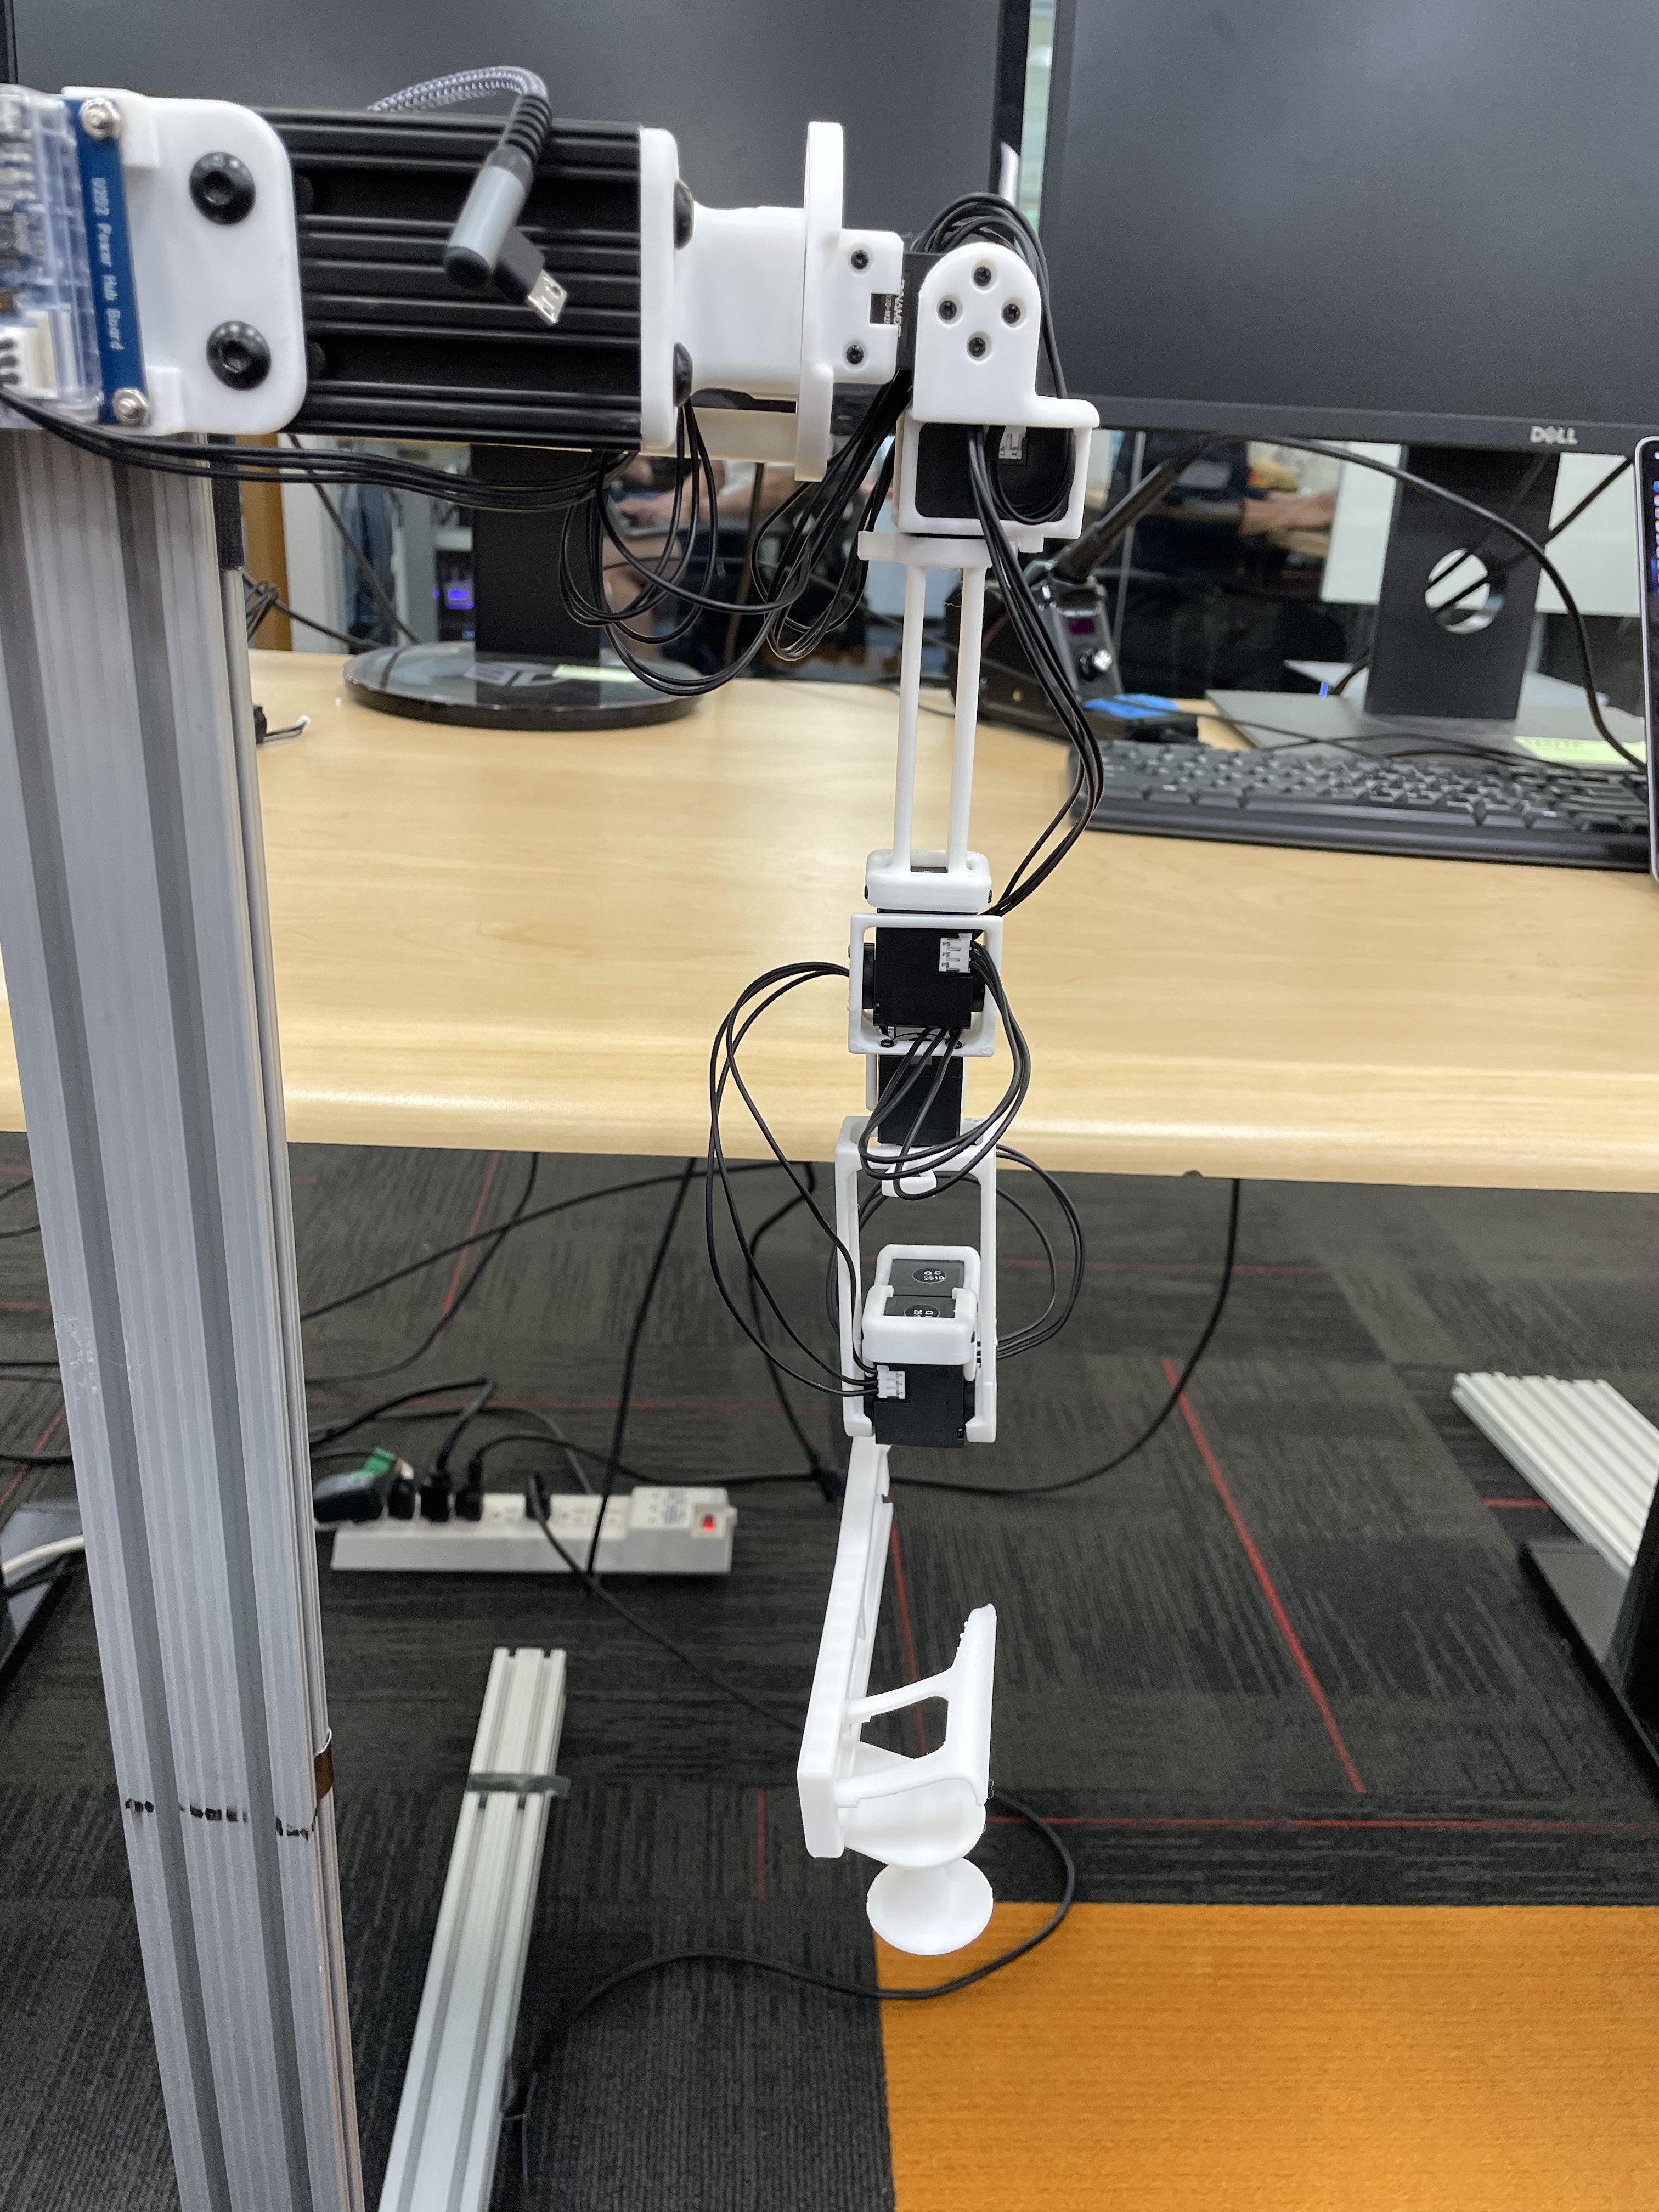 |
| Calibration Position | 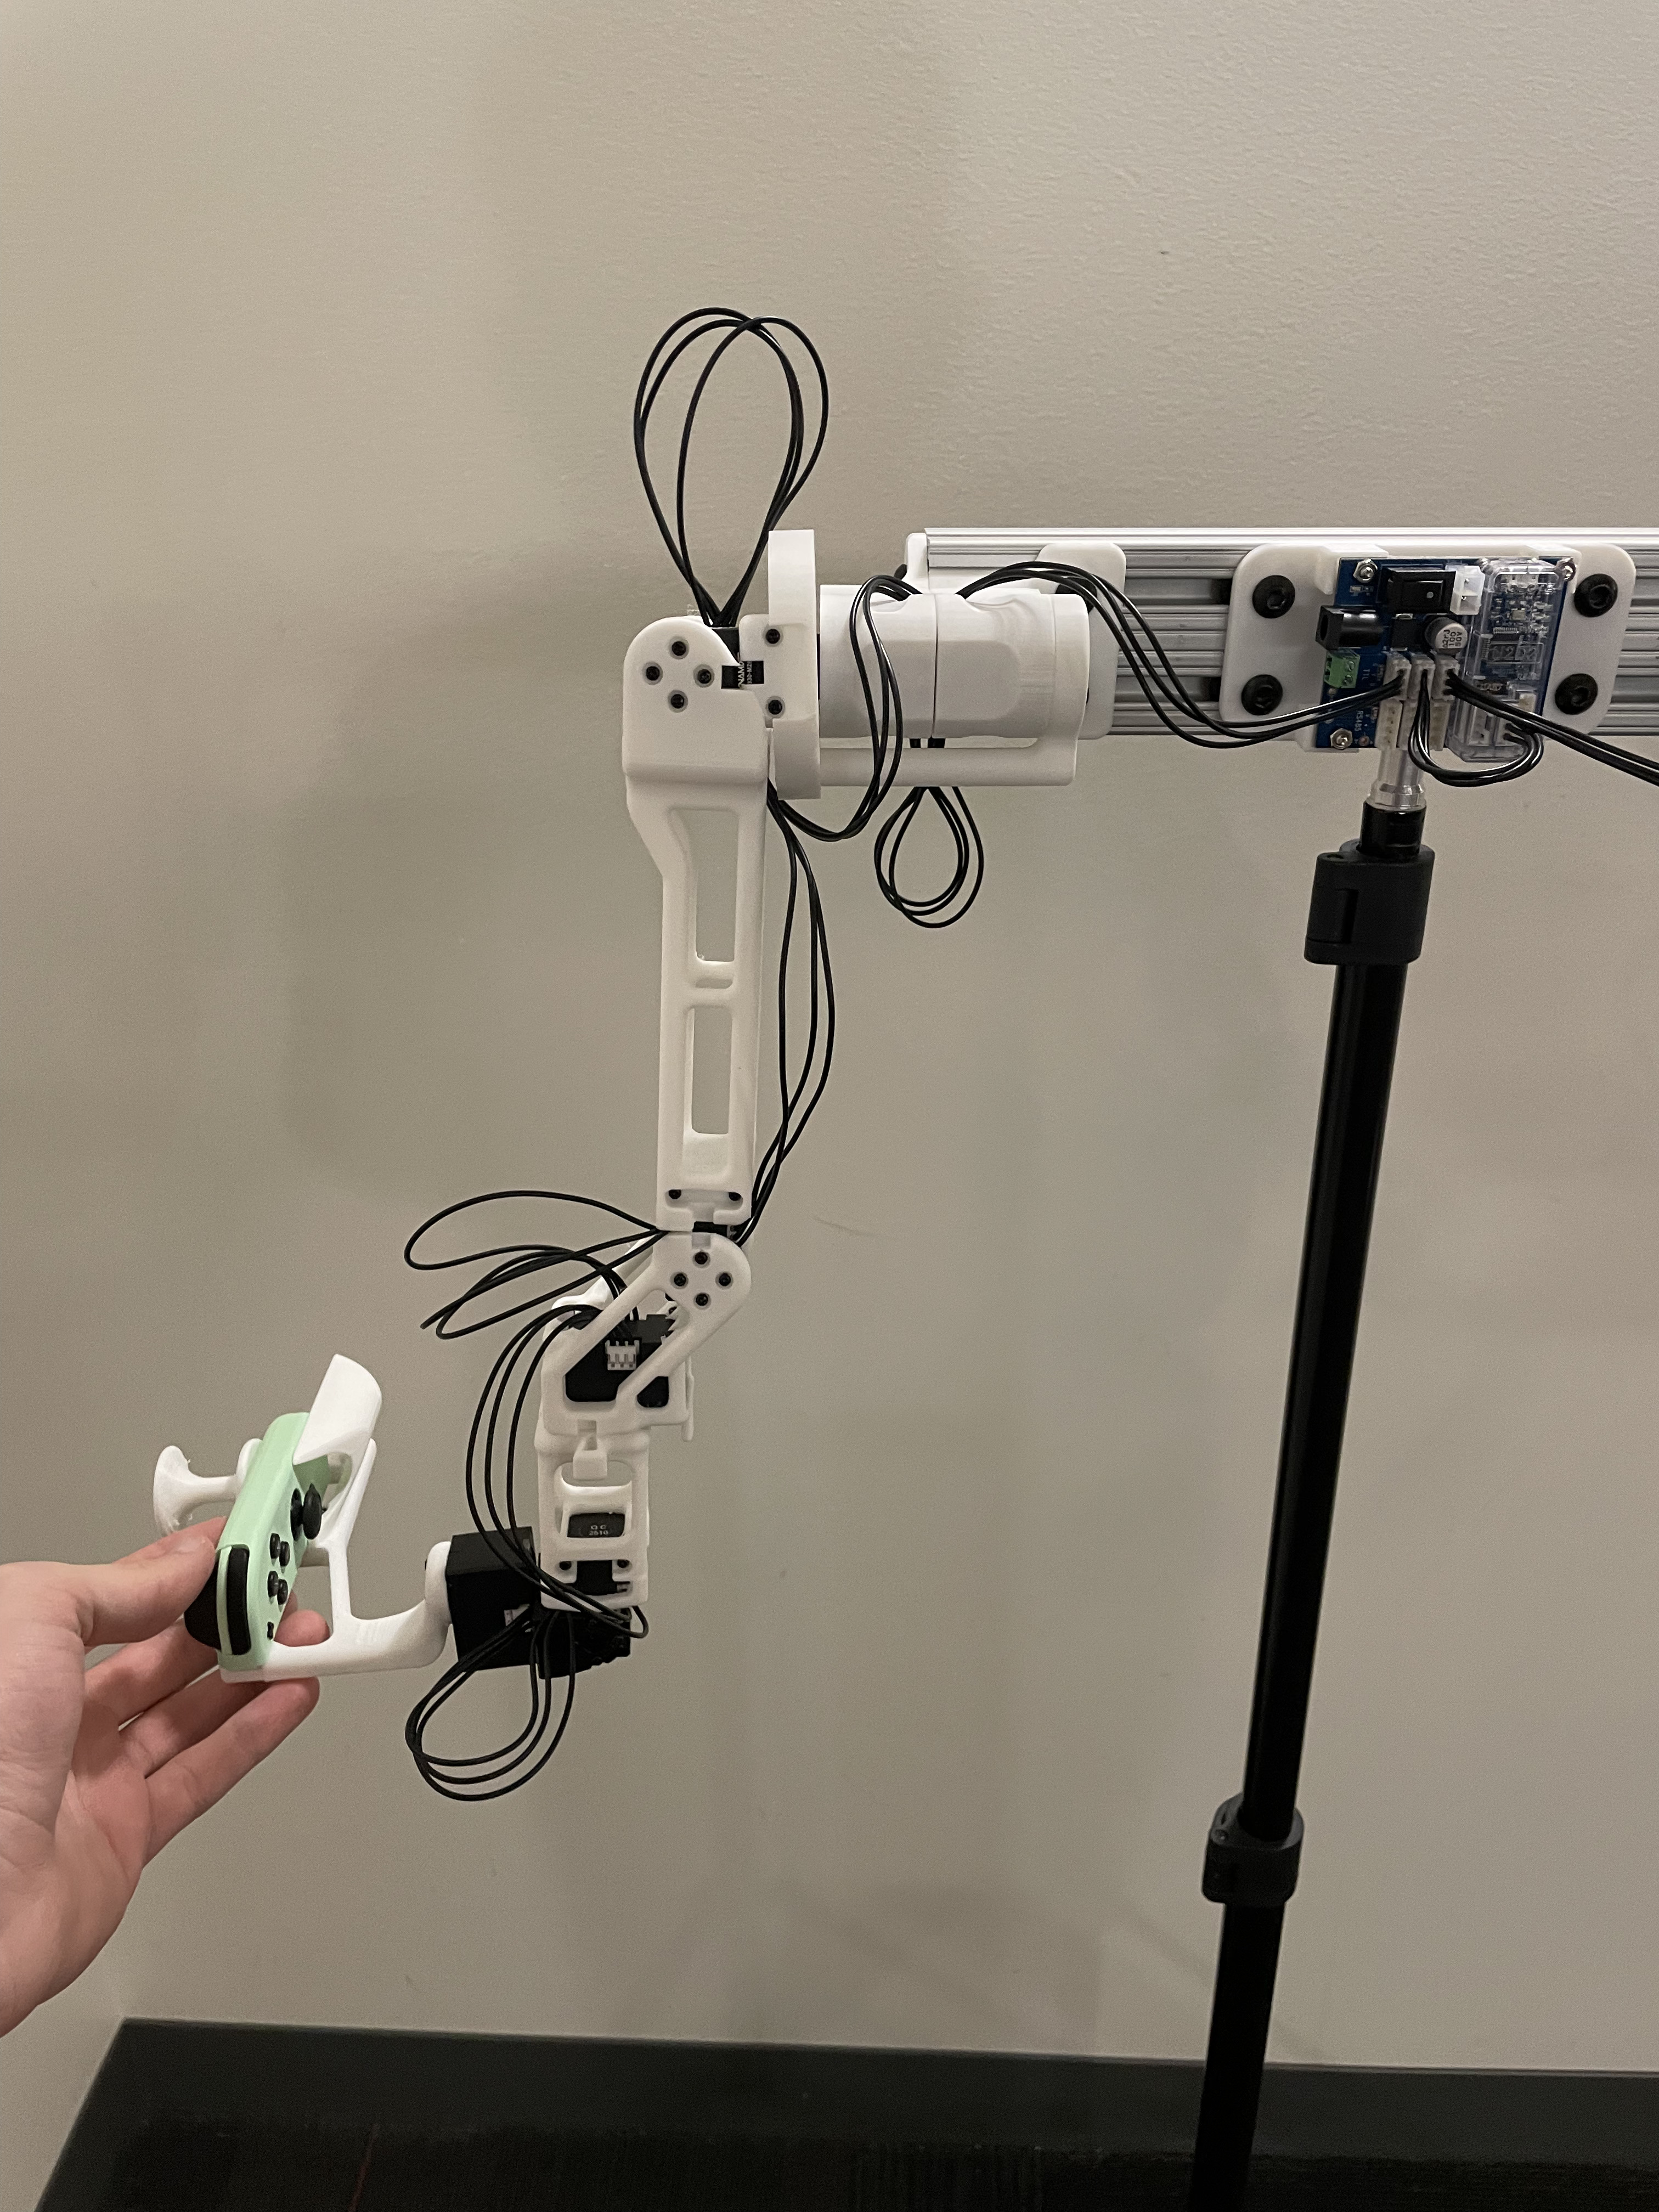 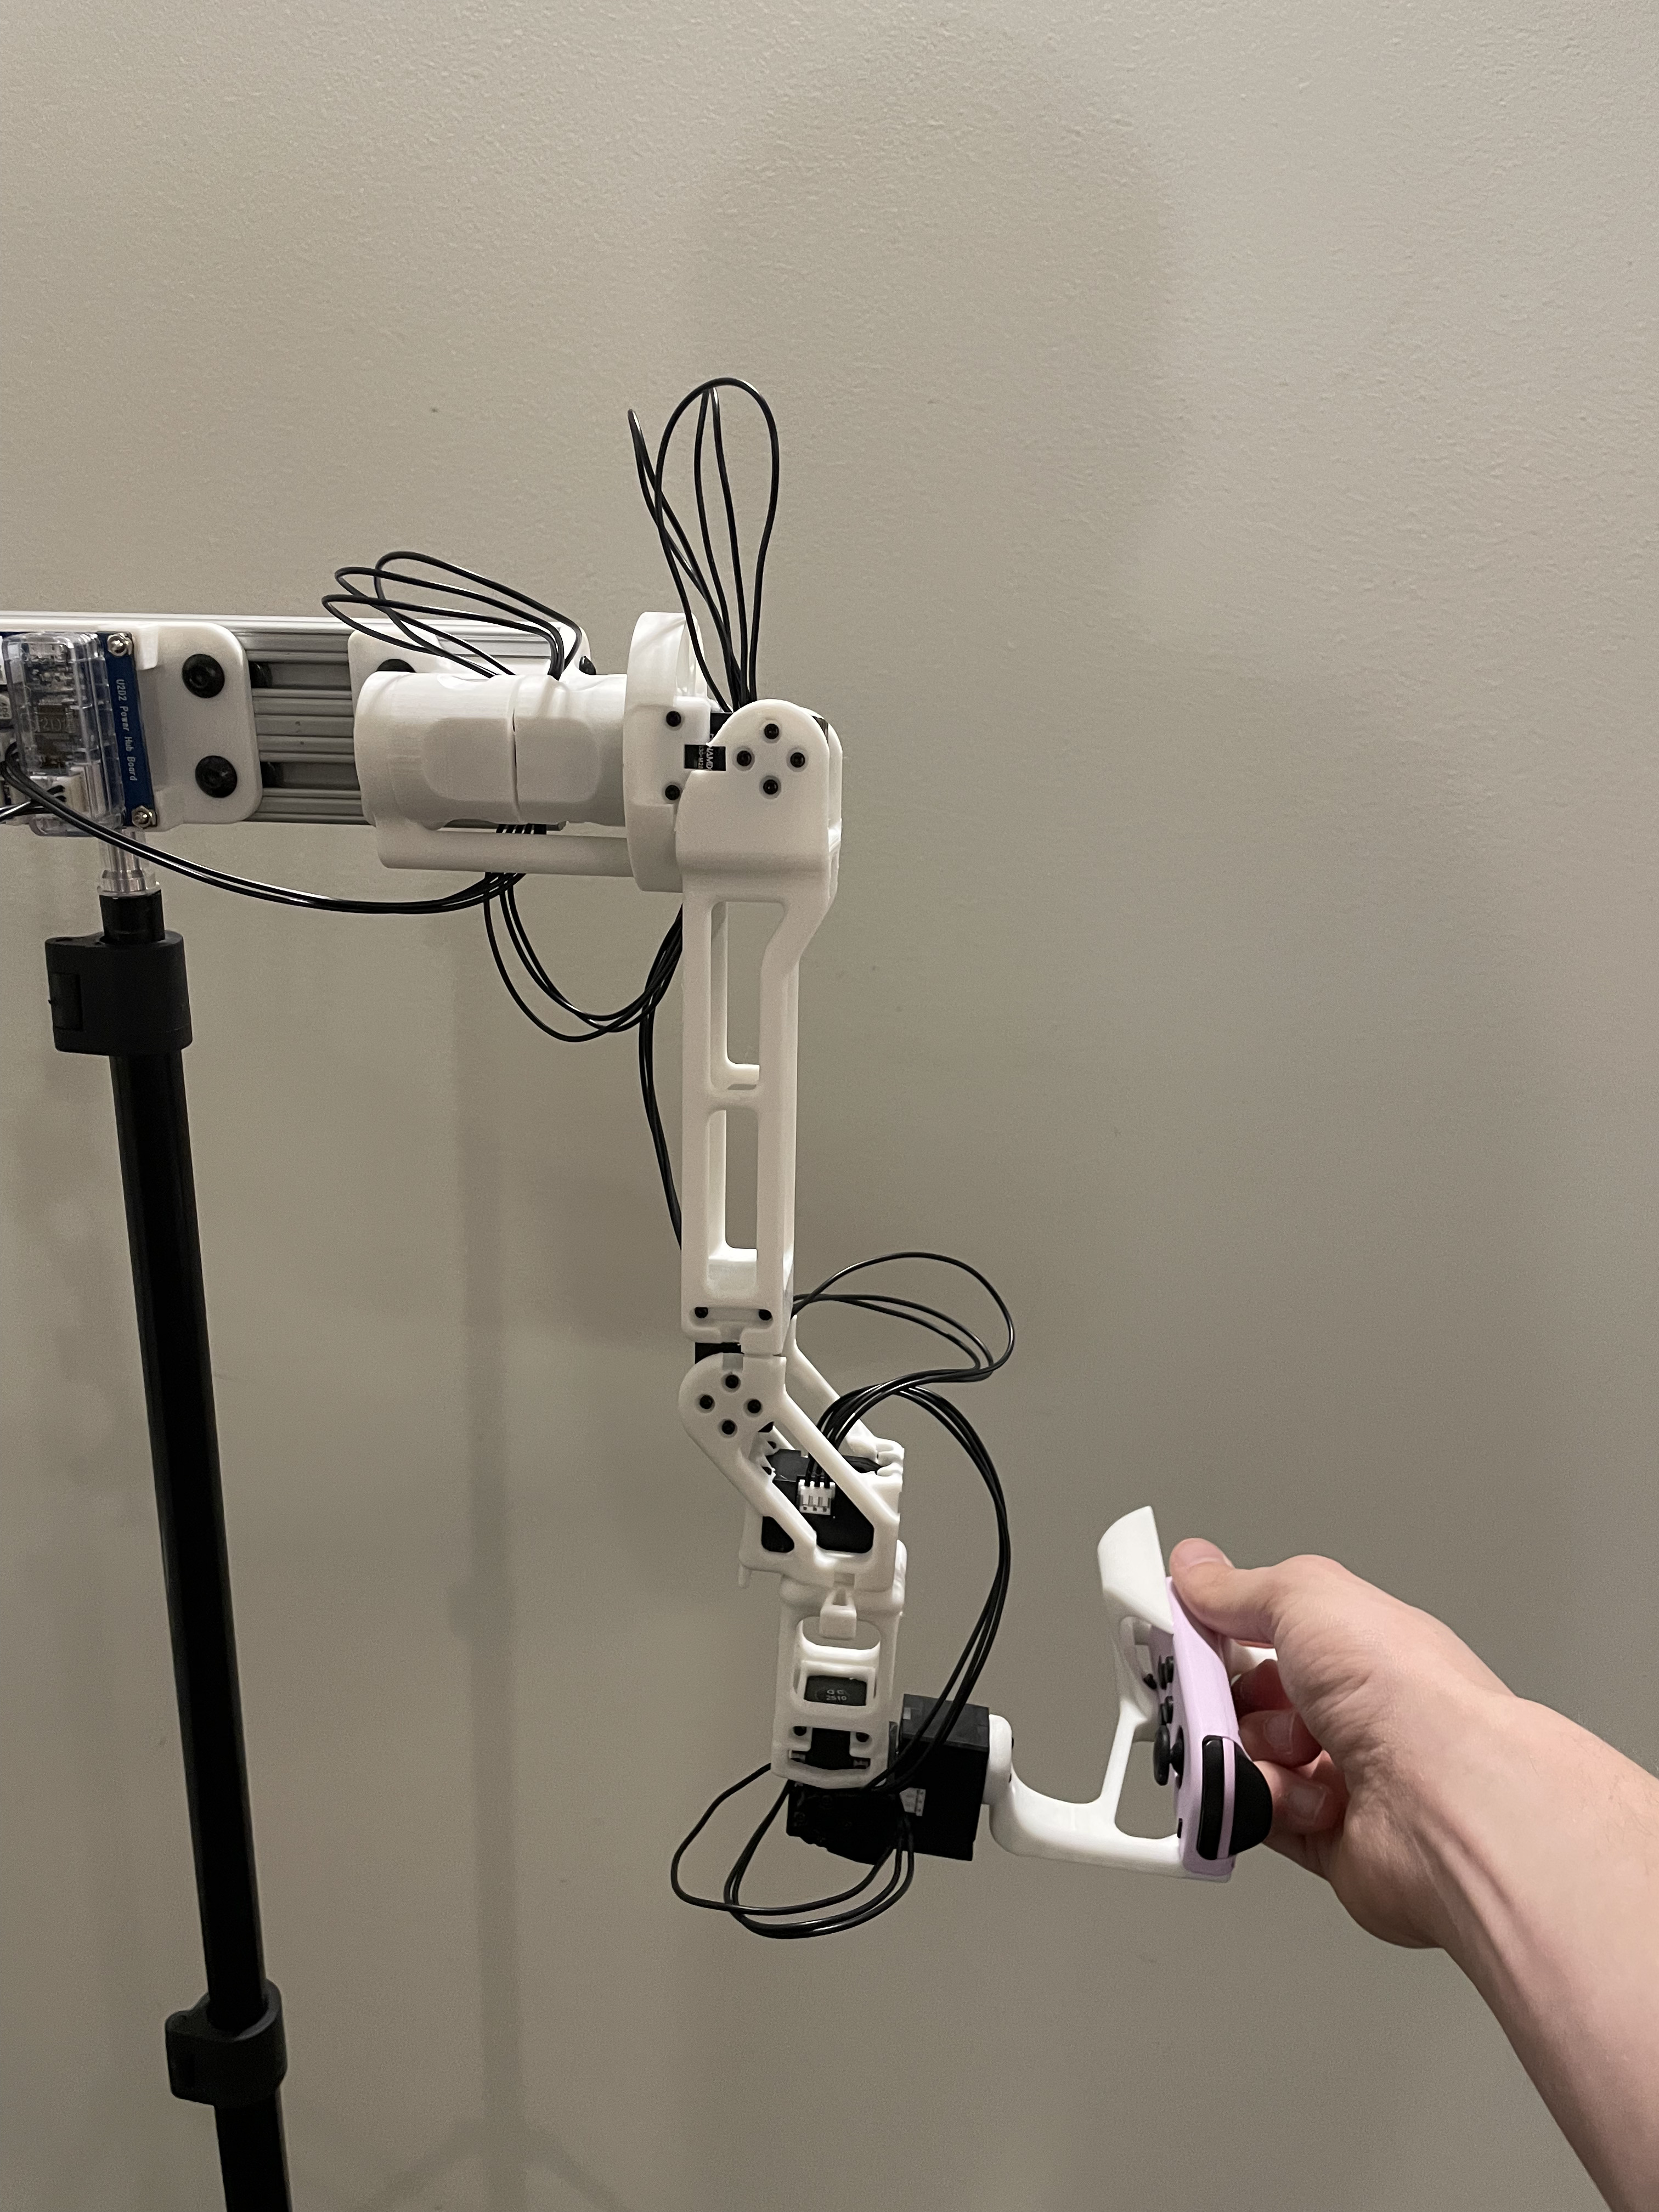 NOTE: Take from the front - note the forwards orientation of the notch on the wrist joint NOTE: Take from the front - note the forwards orientation of the notch on the wrist joint |
 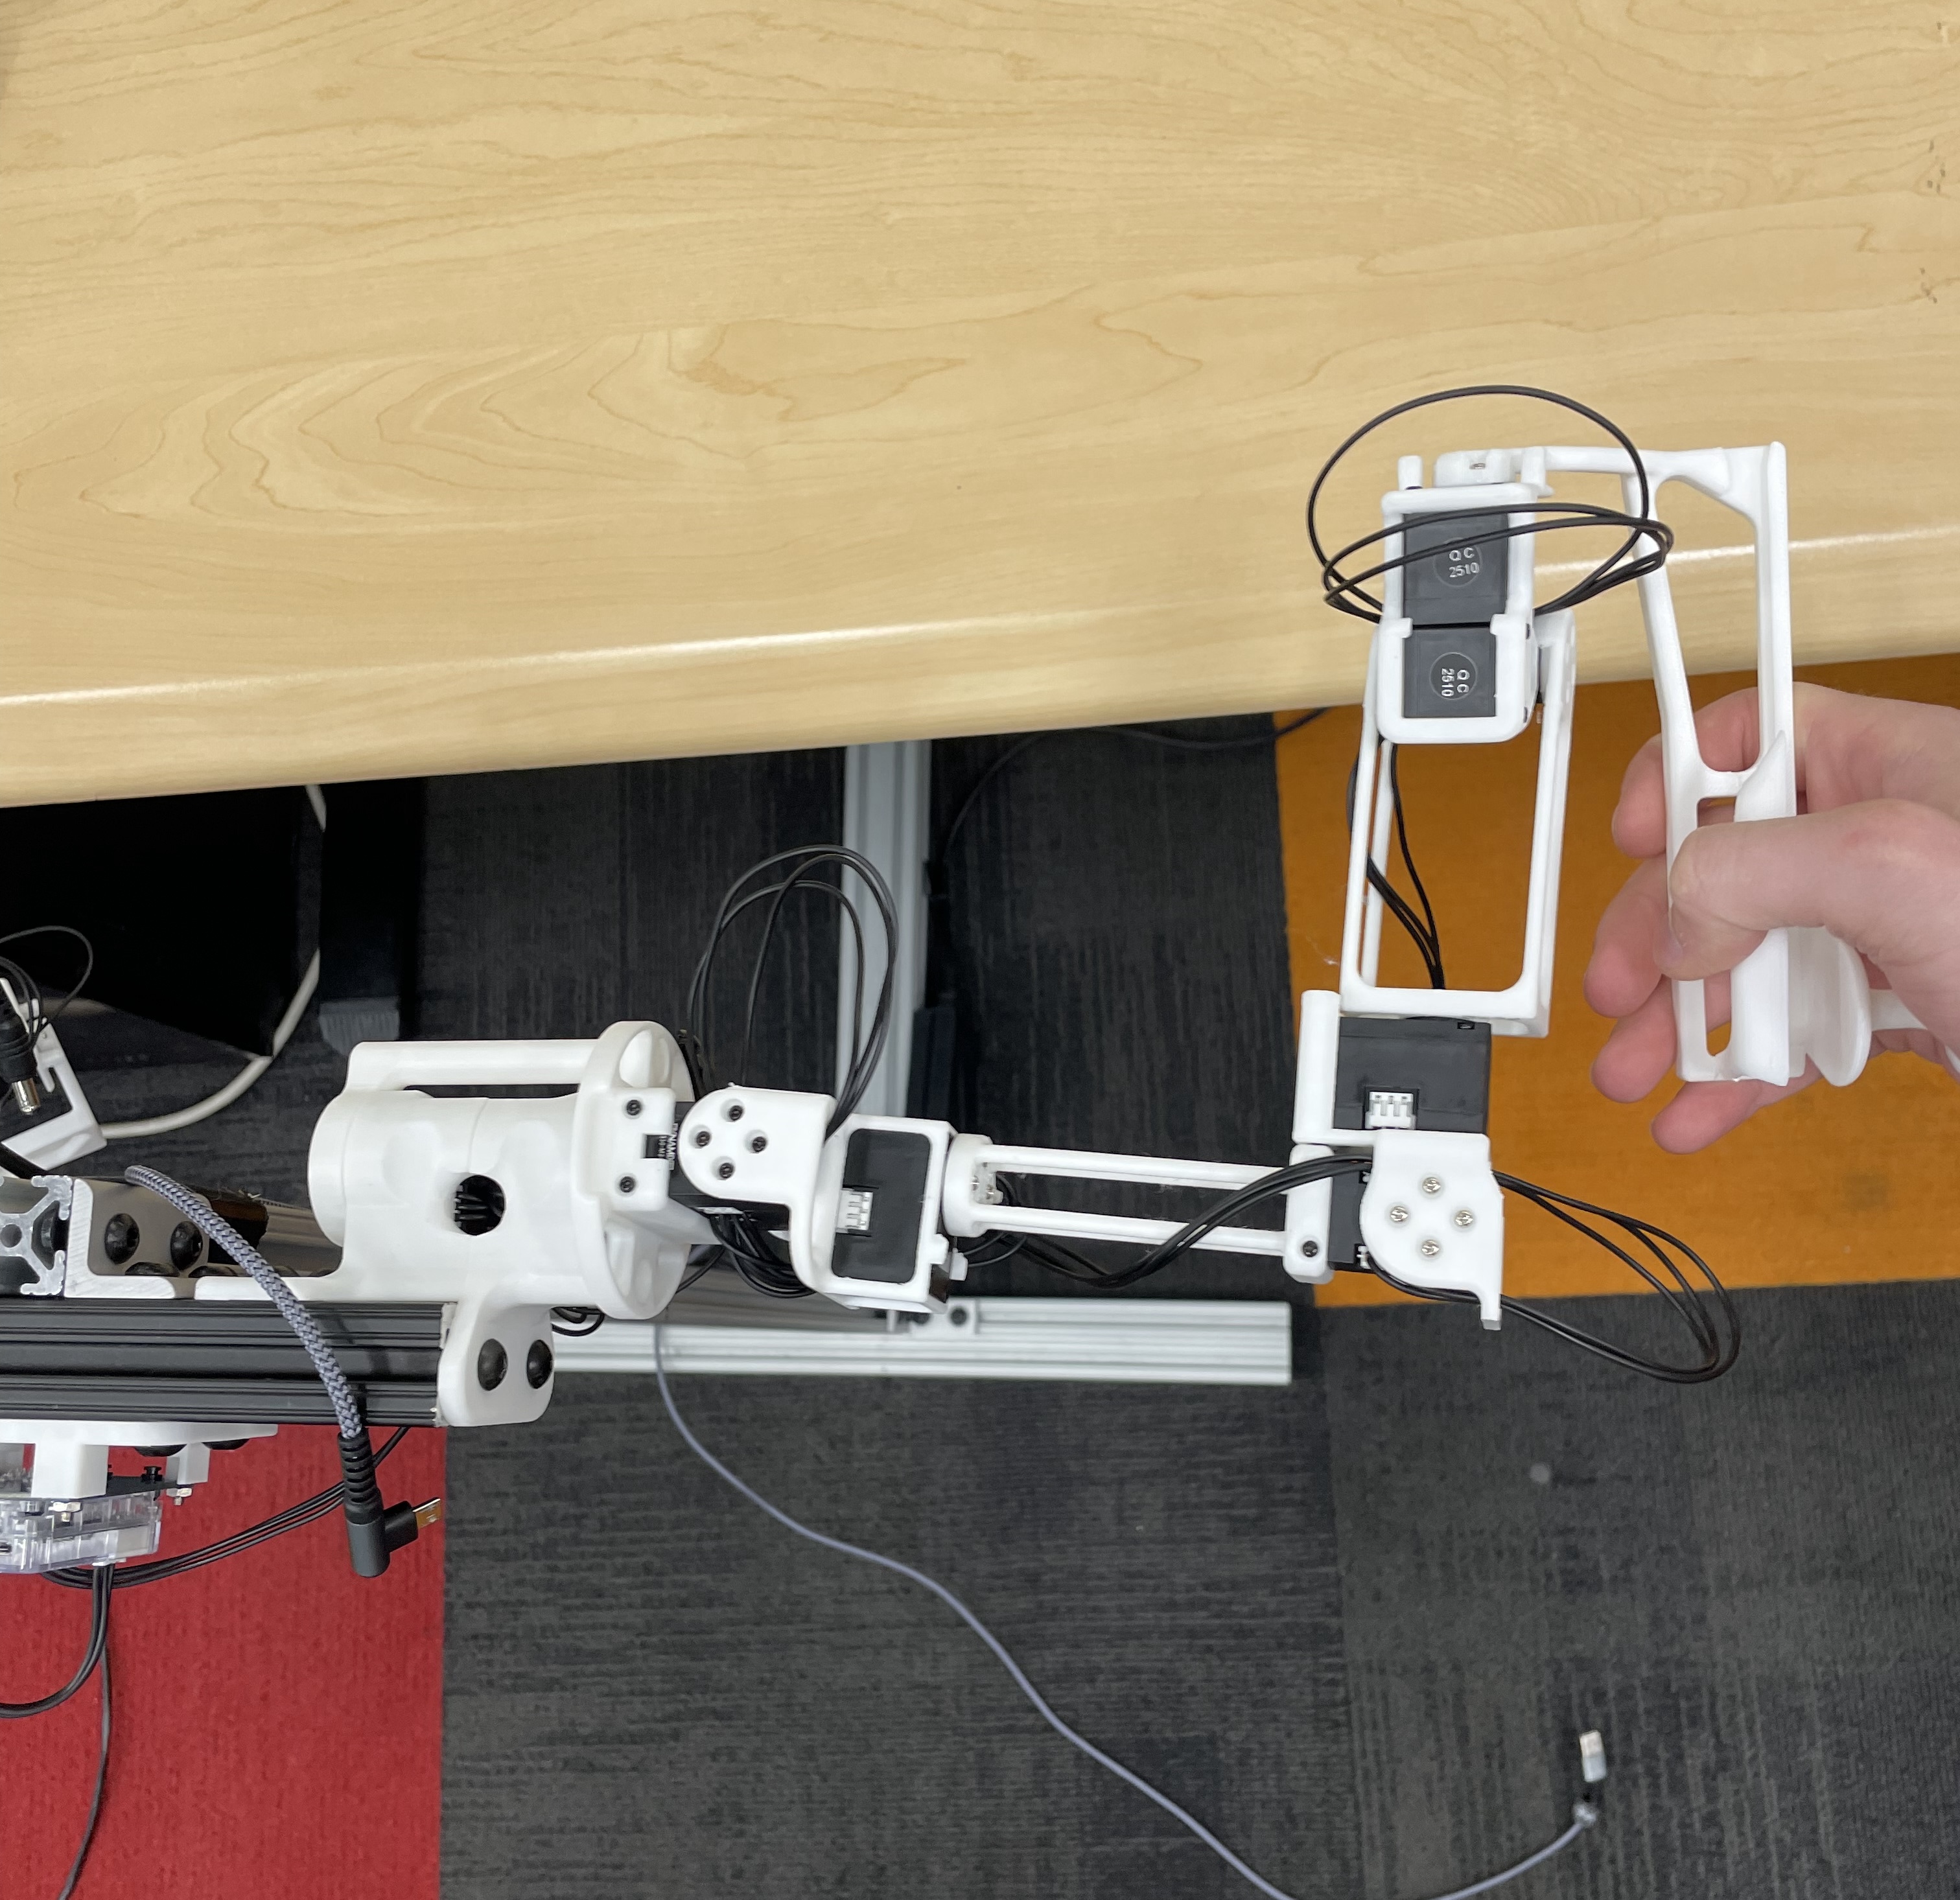 |